A Beginner's Guide to Composting at Home

October 4, 2024

With a few tools and handy tips, you too can start composting at home.
Have you ever taken a moment to wonder where all your discarded yard waste and food scraps go? If you’re putting them in a bin, the outlook isn’t great. The good news? Rather than let them end up in a landfill, you can take control of your waste and create “black gold” for you via composting!
Understanding Composting
Composting, like any new process, can be intimidating, but whether you have a big backyard or just a small kitchen counter, starting a successful compost bin is easier than you may think. Afterall, it’s about letting nature’s tiny recyclers do all the work for you.
- What's the difference between recyclable and compostable?
- What's the difference between biodegradable and compostable?
How it Works
Proper composting requires a balanced diet for your composers–that means a mix of nitrogen-rich "green" items like food scraps and grass clipping as well as carbon-rich "brown" items like dry leaves and cardboard.
As microorganisms eat the organic materials, they create heat. This heat in turn speeds up the breakdown process, allowing helpful bacteria and fungi to grow in a safe, contained space. These “good” bacteria and fungi become “black gold” fertilizer—perfect for at-home gardening or sustainable landscaping.
What You’ll Need
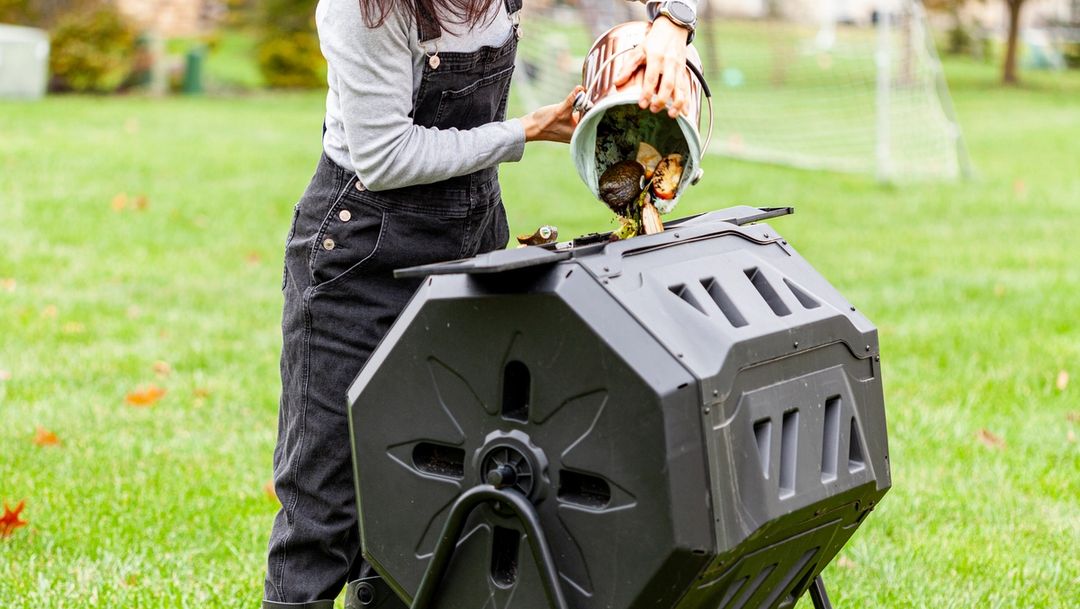
- Compost Bin: You can buy one from your local hardware store or make your own from wooden pallets or a big trash can (just be sure to drill holes for air circulation).
- Garden Fork or Shovel: You’ll need these tools to turn the compost, mix materials, and add air to the pile.
- Small bucket or Container: Having a container in your kitchen makes it easier to collect kitchen scraps throughout the day.
- Water Source: It’s important to keep your compost moist.
- Straw or Twigs: Forage from your neighborhood or purchase straw at your local feed supply store.
Choosing Your Compost Location
For ideal decomposition, look for a flat outdoor space that drains well. This keeps excess water from building up. You also want a good balance of sun and shade since too much heat can dry out your compost.
Make sure the area has good air circulation so the microorganisms that break down your brown and green materials have enough oxygen.
Avoid putting your compost pile right next to wooden structures or fences. The moisture can attract pests and cause damage.
If space is tight, consider using a compost tumbler designed for indoor usage.
A Step-by-Step Guide to Starting Your Compost
Now that you have your tools and you’ve found a good place, it’s time to get started!
Step 1: Setting Up Your Composting Area
Whether you are putting your compost bin on the ground or using a container, it is important to make a good space for the decomposition process. If you are using a backyard compost pile, begin by loosening the top layer of soil to attract helpful worms and facilitate proper drainage.
Next, add a few inches of twigs or straw at the bottom of the pile. This layer helps with aeration and drainage. If you are utilizing a compost bin, you can skip preparing the soil and just move straight into your twig or straw layer.
Then you can start adding your compostable materials!
Step 2: What to Compost - Greens and Browns
Think of your compost pile like a recipe. It needs a good balance of ingredients that we refer to as "greens" and "browns." Greens are materials full of nitrogen, while browns bring the carbon. A good rule of thumb is two parts brown to every one part green.
Green Materials:
- Food scraps
- Grass Clipping
- Coffee Grounds
- Once fresh items
Brown Materials:
- Dry leaves
- Twigs
- Shredded newspaper
- Cardboard
Start by putting down a layer of brown materials–at least a couple inches thick.
Then, add a similarly thick layer of green materials, and as you build your pile, spritz or sprinkle just a bit of water over each later. Your layers should feel like a slightly damp sponge.
Continue adding layers, switching back and forth between green and brown until your bin is full. As it breaks down, the contents of the bin will naturally compress.
What NOT to Compost
These can attract pests, create bad smells, or introduce harmful bacteria:
- Do not add dairy products to your compost pile.
- Avoid putting in meat and bones.
- Keep oily foods out of the pile.
- Also, do not add pet waste or diseased plants.
- Lastly, avoid adding weed seeds.
Step 4: Maintaining and Turning Your Compost
Regular care keeps your compost pile a lively place for decomposition. That means turning your compost pile every one to two weeks. This adds oxygen so your pile’s microorganisms can thrive.
You also need to stay on top of moisture. Happy microorganisms need a damp place to do their work, so check the moisture often. If it's dry, add water. If it gets too wet from rain, cover it up. You’re looking for that damp sponge feeling at all times.
A good compost pile should also smell earthy. If you smell particularly bad odors, there may be an imbalance of green and brown materials.
Step 5: Harvesting Your Compost
After a few weeks of taking care of your compost pile, the time will come when you can harvest your "black gold." You’ll know your compost is ready when it smells rich and earthy, feels crumbly, and looks dark brown or black. Try a simple sniff test—if it still has a strong smell of ammonia or rotting food, it needs more time to mature.
Harvesting time will depend on temperature, moisture levels, and materials used. It can take a few months or even a year for compost to be ready, but once it’s done, you can return your compost to the earth as nutrient-rich fertilizer for your garden soil!
Making the Most Out of Your Compost
You can mix compost into soil prior to planting, but you can also add compost on top of the soil of an existing plot. Simply spread a loose layer around your plants to slowly release nutrients into the soil. If you’re starting with seeds, mix compost with potting soil to make a rich growing mix. Then, sit back and enjoy the spoils of your healthy, thriving, and especially eco-friendly garden!
Frequently Asked Questions
How do I dispose of Blueland packaging?
All of our packaging is recyclable and our tablet wrappers are compostable and biodegradable. Our boxes and packaging can be recycled curbside, our tablet wrappers and tablet / powder pouches are compostable and our bottles (if damaged) can be sent back to us for recycling.
Keep Reading
Refill is the New Recycle
The perfect way to start cutting out single use plastic from your home.


